

If you’ve got multiple contact forms on your sites, customising the Sender name can improve how you and your clients handle submissions. You'll be able to see which contact forms are converting well directly from your inbox.
Use a different sender name for each form by adding a sender name in the submission tab, so when submission notices come in, you’ll see at a glance which form was submitted. The email address beside the Sender name is automatically set to no-reply as a reminder not to reply to the submission email. Instead, click Reply to customer link that appears in the email body.
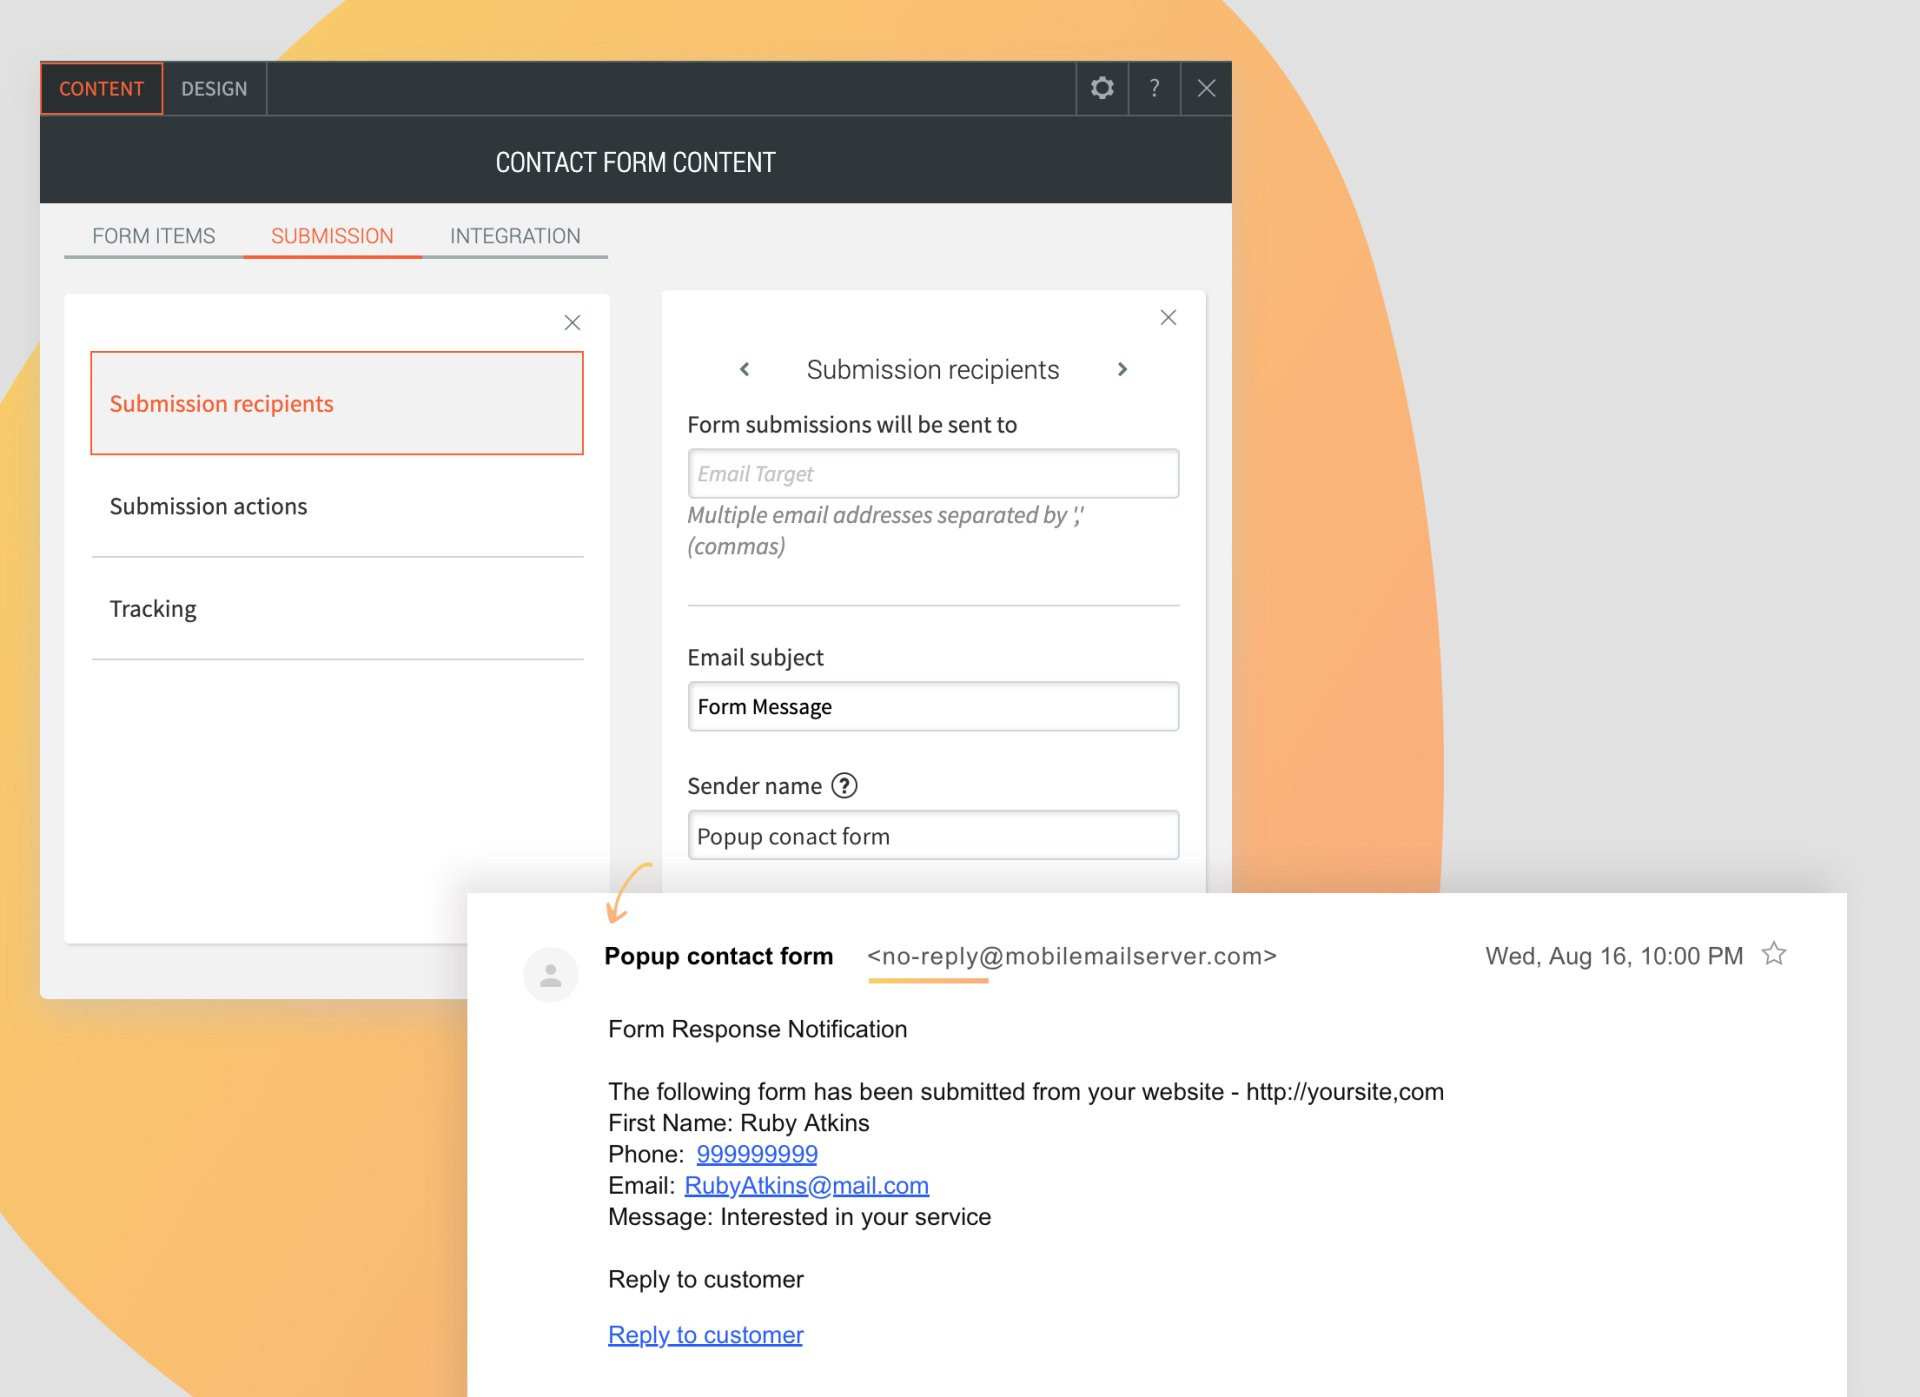
Customising this field can improve your workflow
Here's how:
- Optimise contact form placement and copy. If you’ve got multiple contact forms on a site, having a unique sender name for each one enables you to see at a glance which form was used. This can help you optimize the placement and text on the forms.
- Remind your customers who built the form. Adding your agency name to this field reminds your customers that you’ve played a part in their conversion success.
- Speed up responses. If the form that’s been submitted requires immediate action (for example, the site visitor wants a quote or more info) you'll know at a glance
Other tips for optimising contact forms
- Only include necessary fields (don’t ask for a fax number if you’re never going to use it).
- Keep the size of the fields reasonable (not too big, not too small) (control this in the Content editor).
- Use compelling button text. For example, Get Quote, Tell Me More, Send Info, etc.
- Including an engaging title and use colours and fonts that visitors notice.