

Your newest template is the rich, multi-page Academic template, geared towards colleges, universities, technical schools and more. The template features 15 pages, each with a different design, designed for conveying a lot of information and plenty of images.
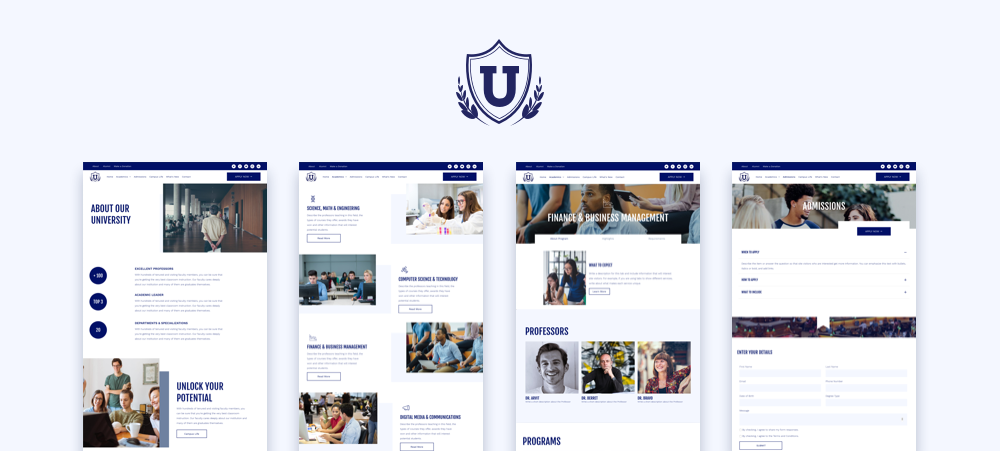
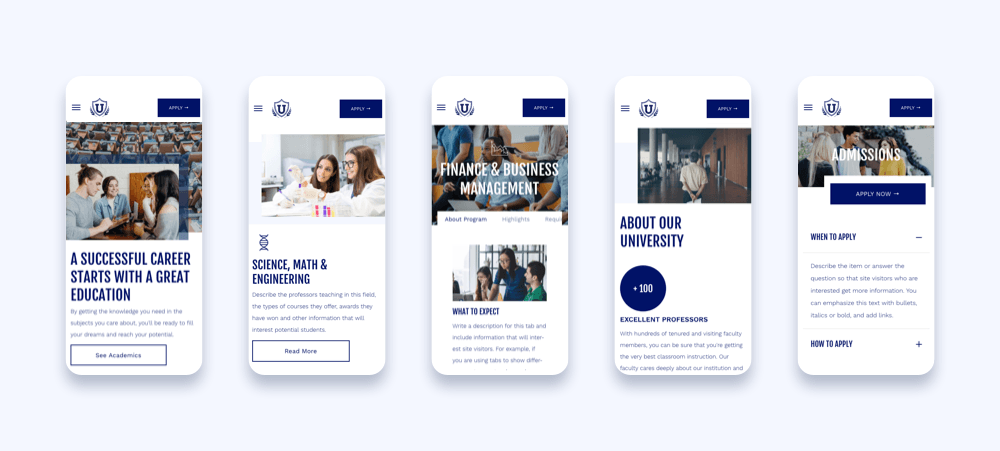
The mobile version of this site is particularly striking and designed with careful consideration of how visitors on mobile will experience the site.
Some template highlights
- Google Calendar widget: Engage visitors and keep them informed by showing upcoming events and activities. For more on this new widget, read this.
- Double navigation bar: This gives you plenty of room for displaying pages.
- Donation page: Enable PayPal donations quickly.
- A blog: Accessible via the What’s New tab, this is ideal for engaging visitors with regular updates about student life.
- Accordion widgets, for maximum use of space: Course programs are arranged in side-by-side accordion widgets in two inner row columns. This allows for texts (that can be linked to full pages) that take up a minimal amount of space.
Simple Steps for Recreating This Template's Neat Designs
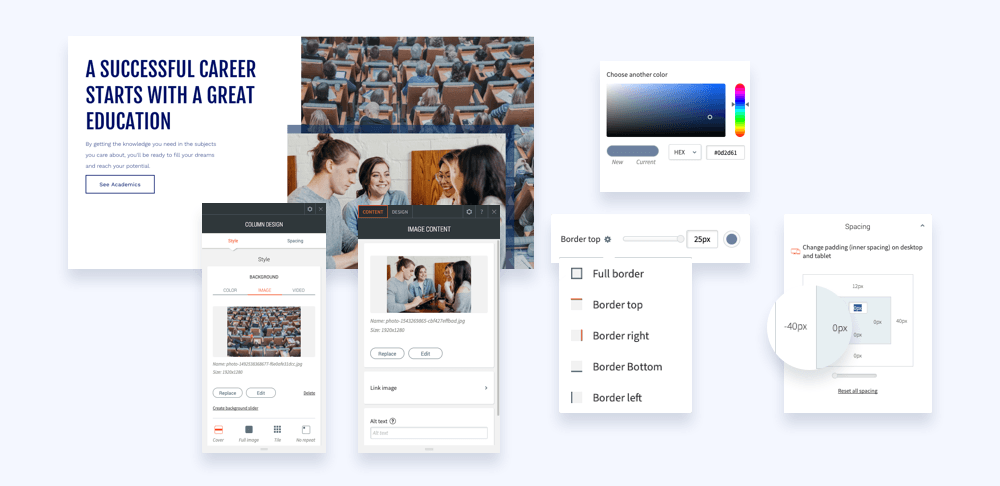
Overlapping slider with a negative margin
The eye-catching effect on the homepage features a slider image with a negative left margin that enables it to overlap with the larger background image. To create this look in your sites, follow these simple steps:
1. Add a full bleed row with two columns.
2. In the left column, set the left padding to 50px and add the following widgets: H1 text, paragraph text and button.
3. In the right column, add a background image and set the position to cover. Add an image widget. Set the top and right border of the image to 28px and set the color to dark blue.
4. Right-click on the image, align it left and set the left margin to -40px.
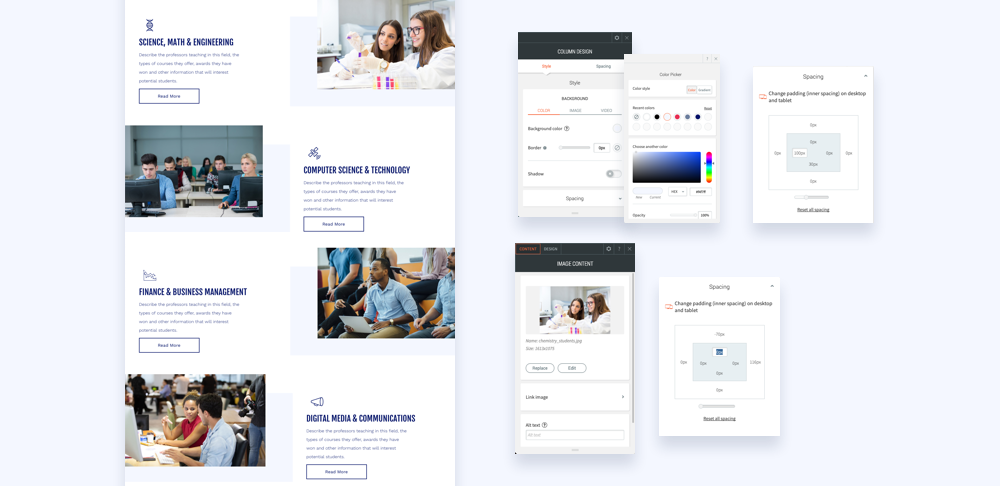
Checkerboard effect for displaying information
To create the effect you see here, follow these steps:
Row with image on right
1. Add a row, set it to full bleed, and set the top and bottom padding to 70px.
2. Add a column to the row so there are 2 columns. In the left column, set the left padding to 50px and add icon, title and paragraph widgets.
3. In the right column, set the background color to light blue and set the left padding to 100px.
4. Add an image widget and upload an image. Right-click on the image, set the alignment to the right and set the top margin to -70px.
Row with image on left
1. Add a row, set it to full bleed, and set the top and bottom padding to 70px.
2. Add a column to the row so there are 2 columns. In the right column, set the right padding to 50px and add icon, title and paragraph widgets.
3. In the left column, set the background color to light blue and set the right padding to 100px.
4. Add an image widget and upload an image. Right-click on the image, set the alignment to the left and set the top margin to -70px.