

Ready, set, action! You've got 10 great Video Sections, newly added to the editor. Located between the Gallery and Events categories, the new Video category has 10 striking designs that are perfect for a range of site styles.
Scroll down to see all the new Video Sections. Immediately below these images, you'll see step-by-step instructions for recreating one of them on your own.
You can use these Sections as Hero images (with video background), for testimonials (show people giving feedback via video), for services, store categories and so much more.
Remember: You can now upload videos directly to the editor - no need to upload them first to an external platform. This makes adding videos to your sites that much easier!
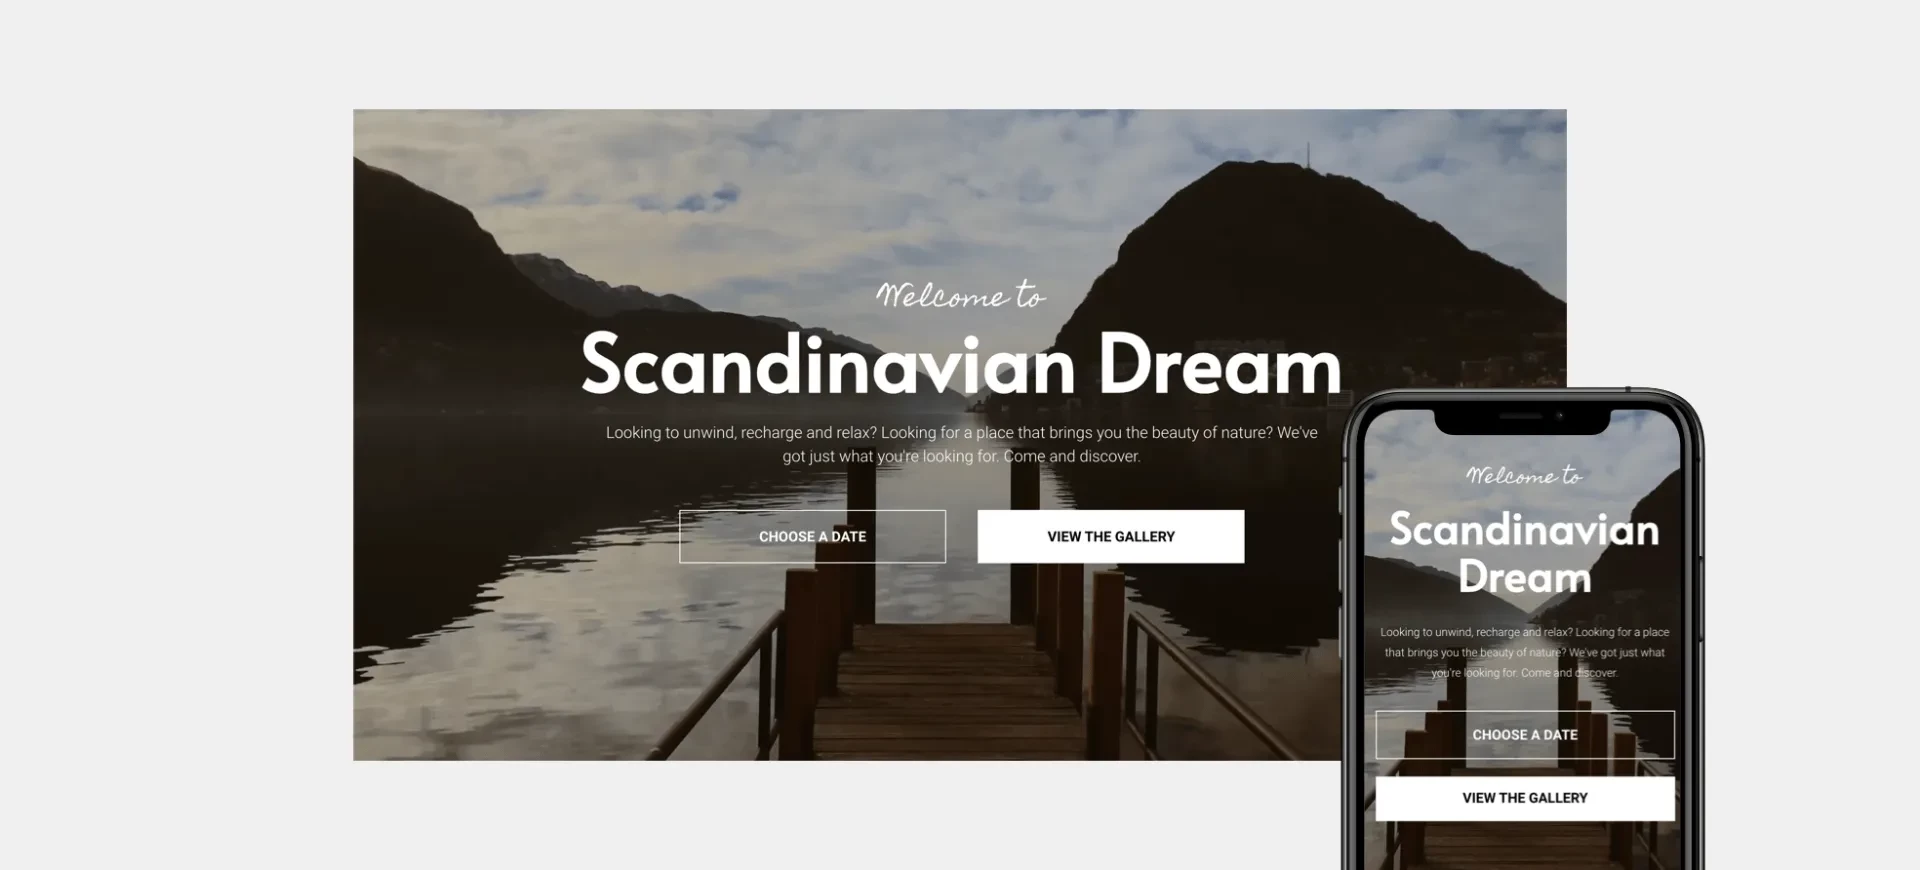
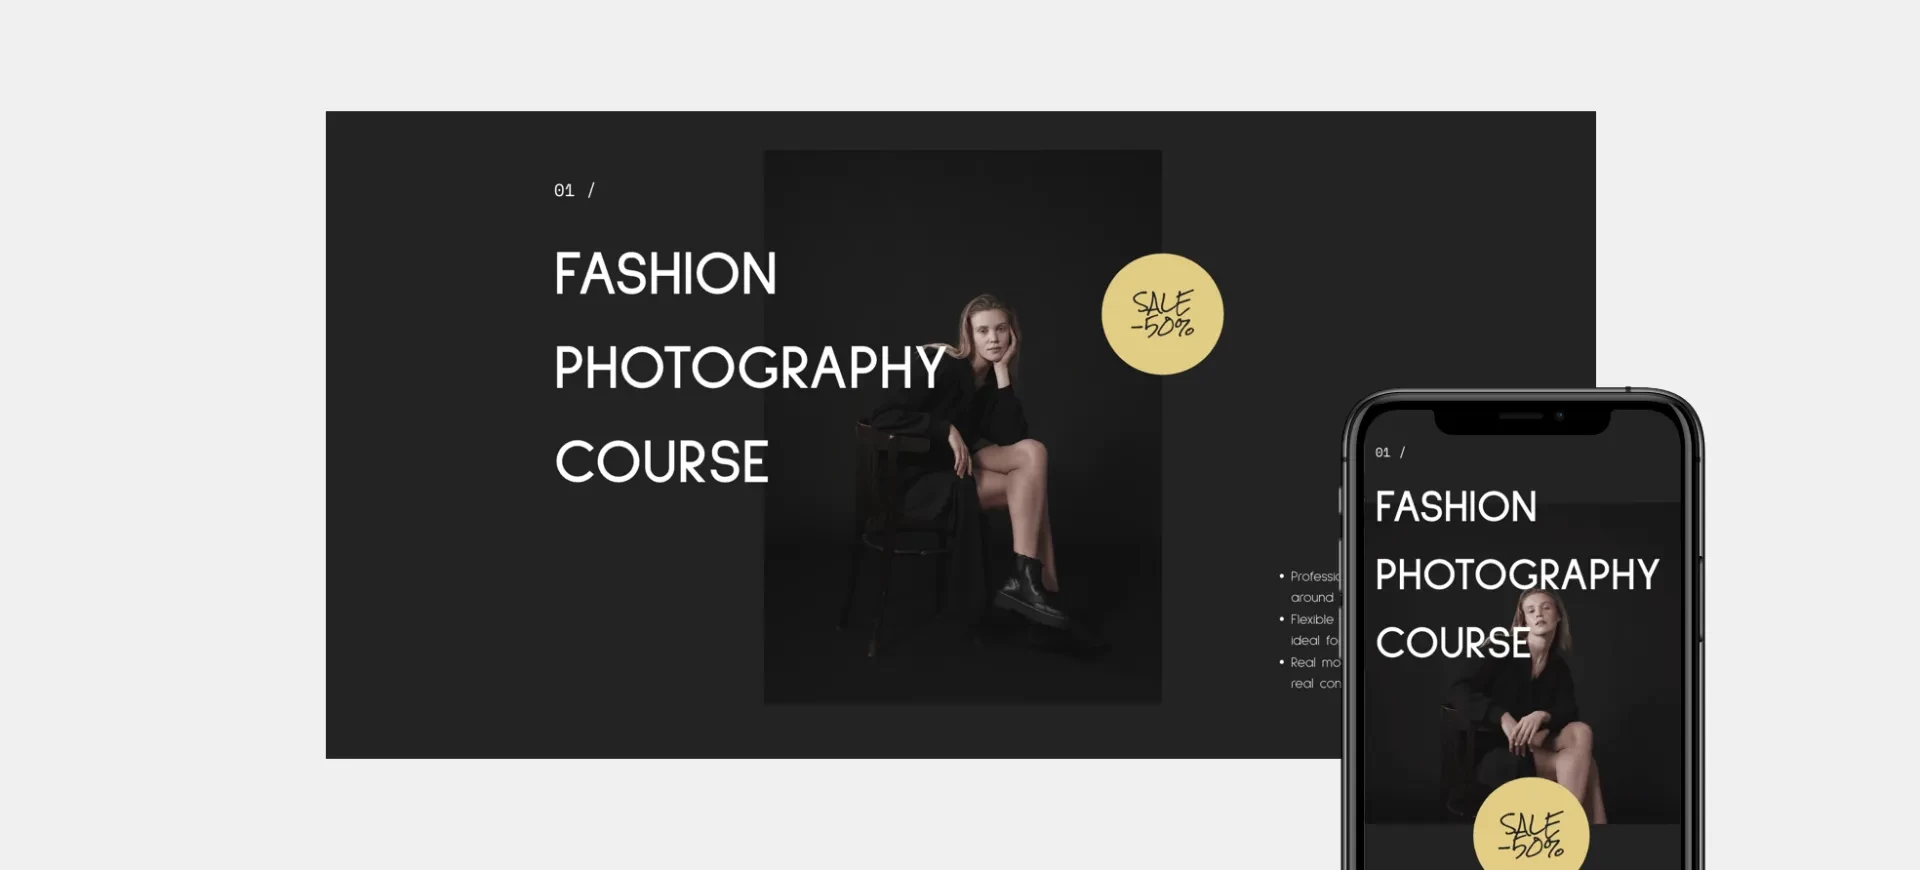
Hero Video Sections
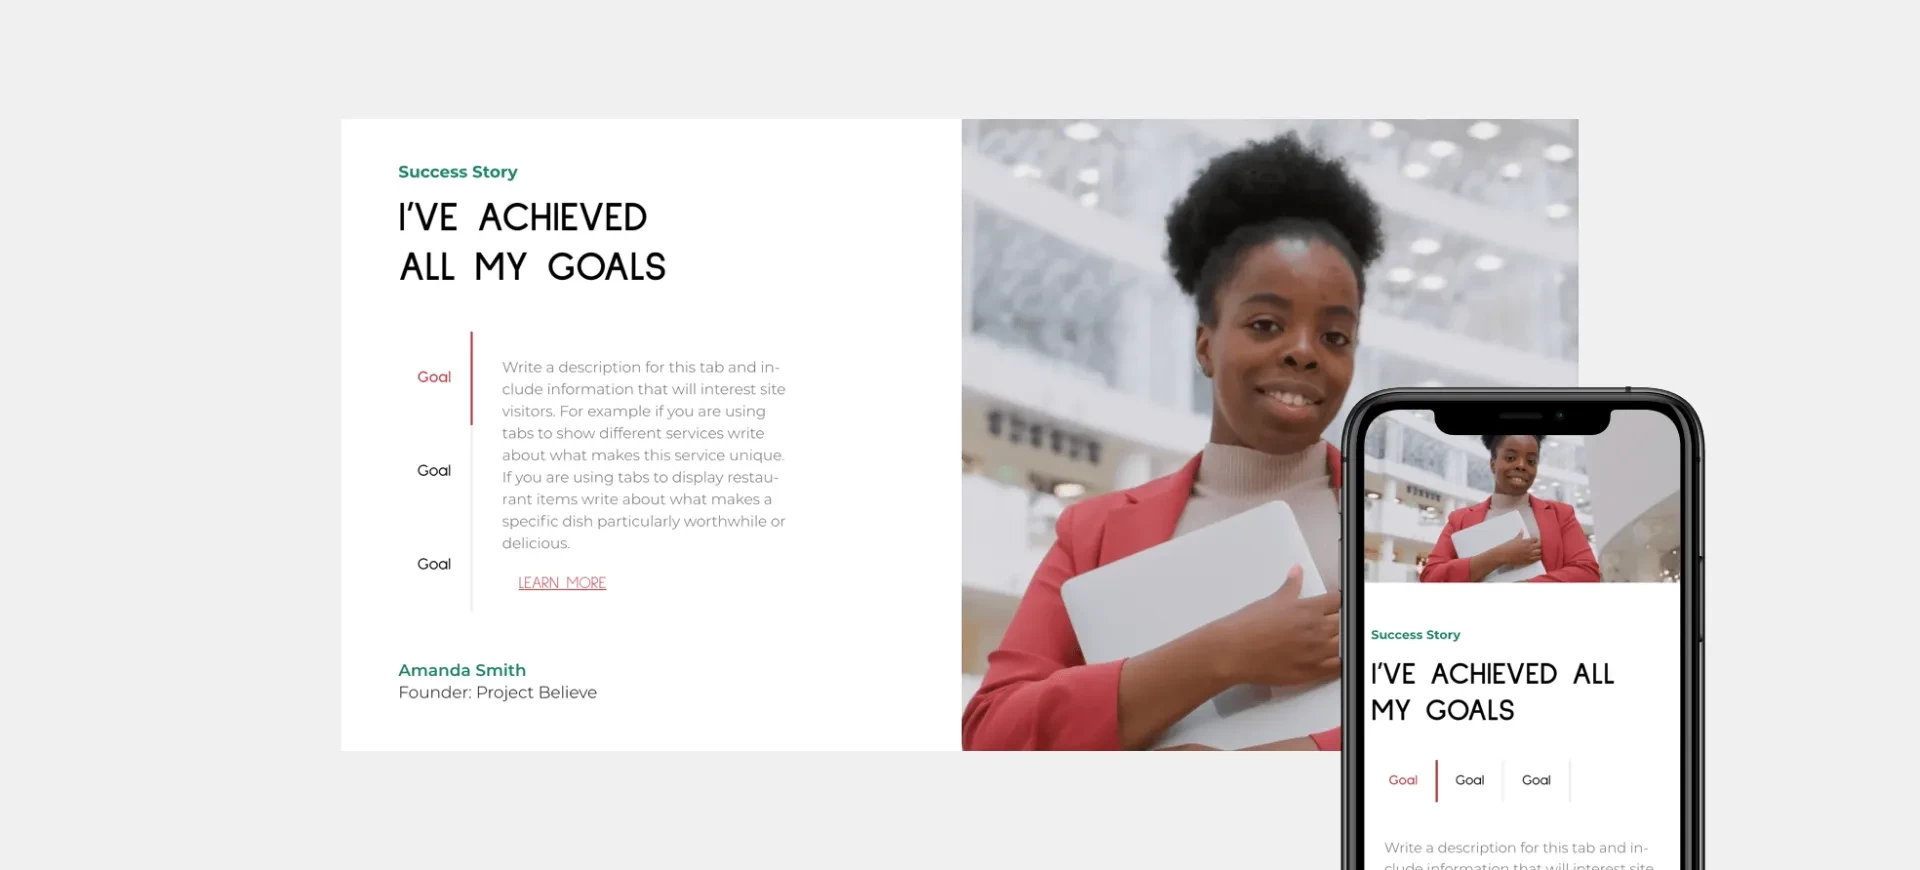
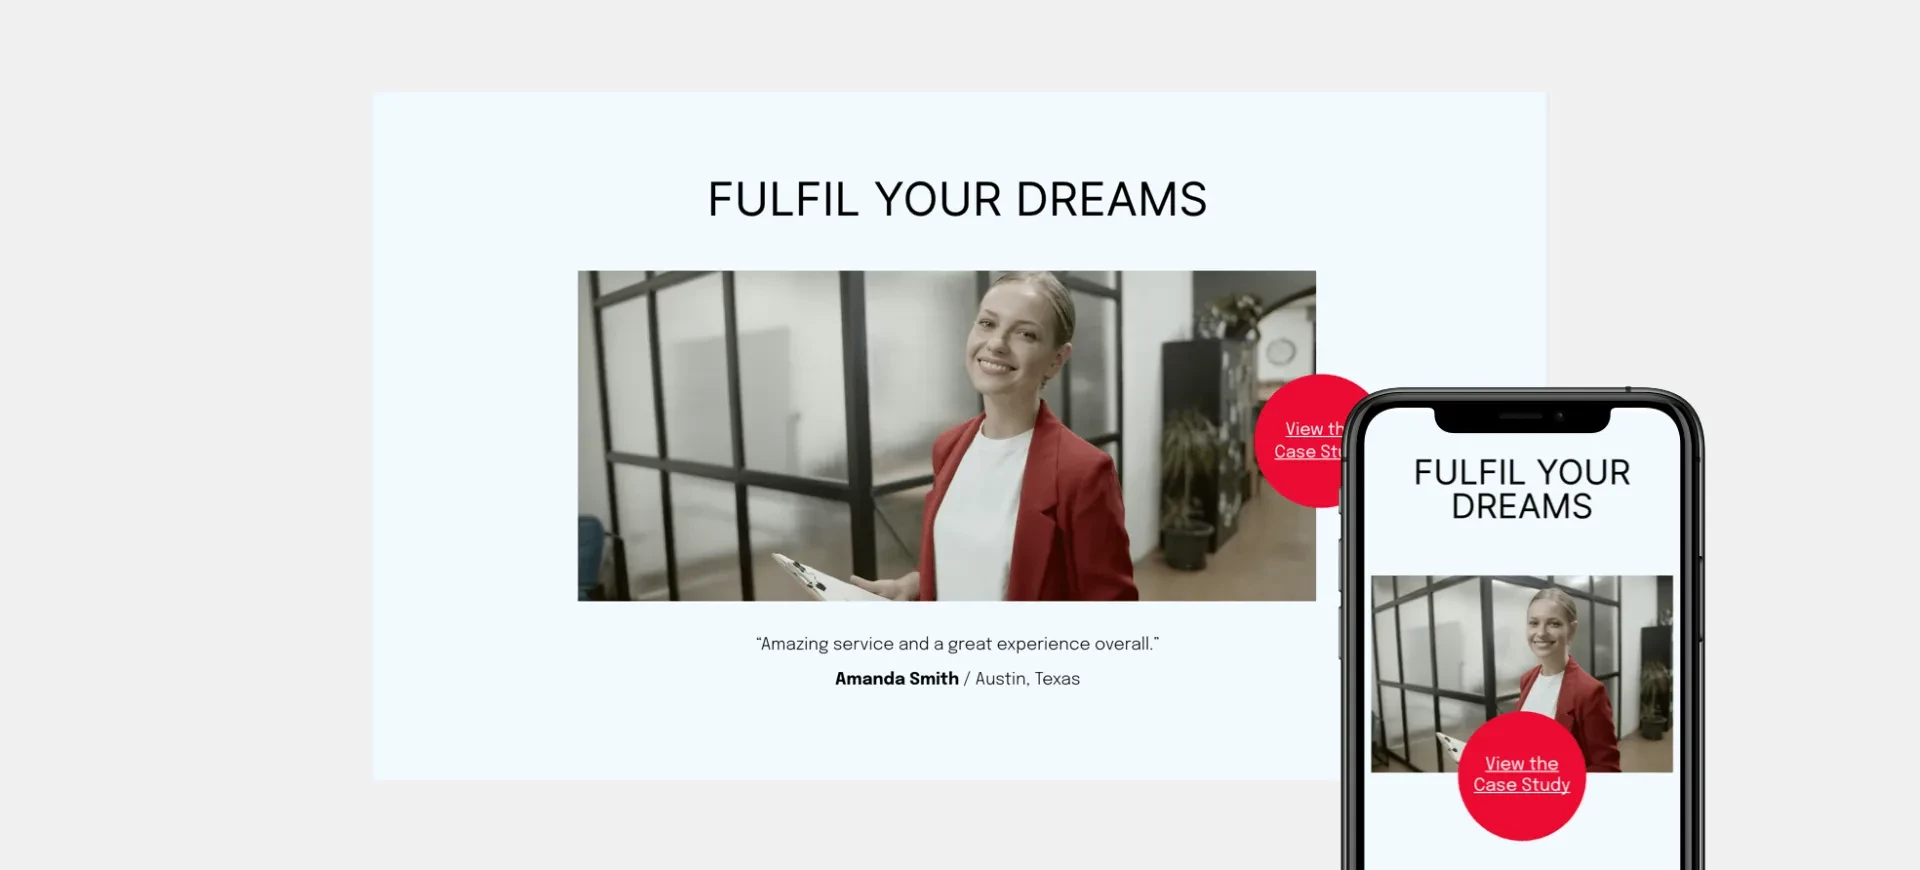
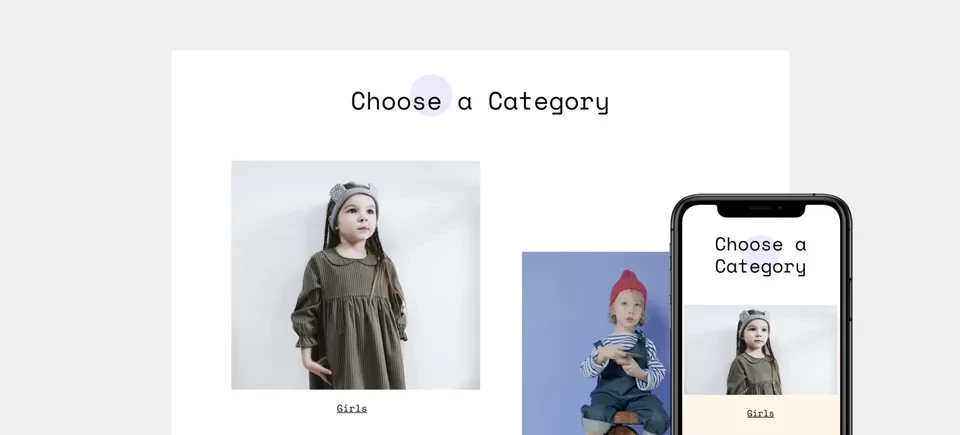
Testimonial Video Sections
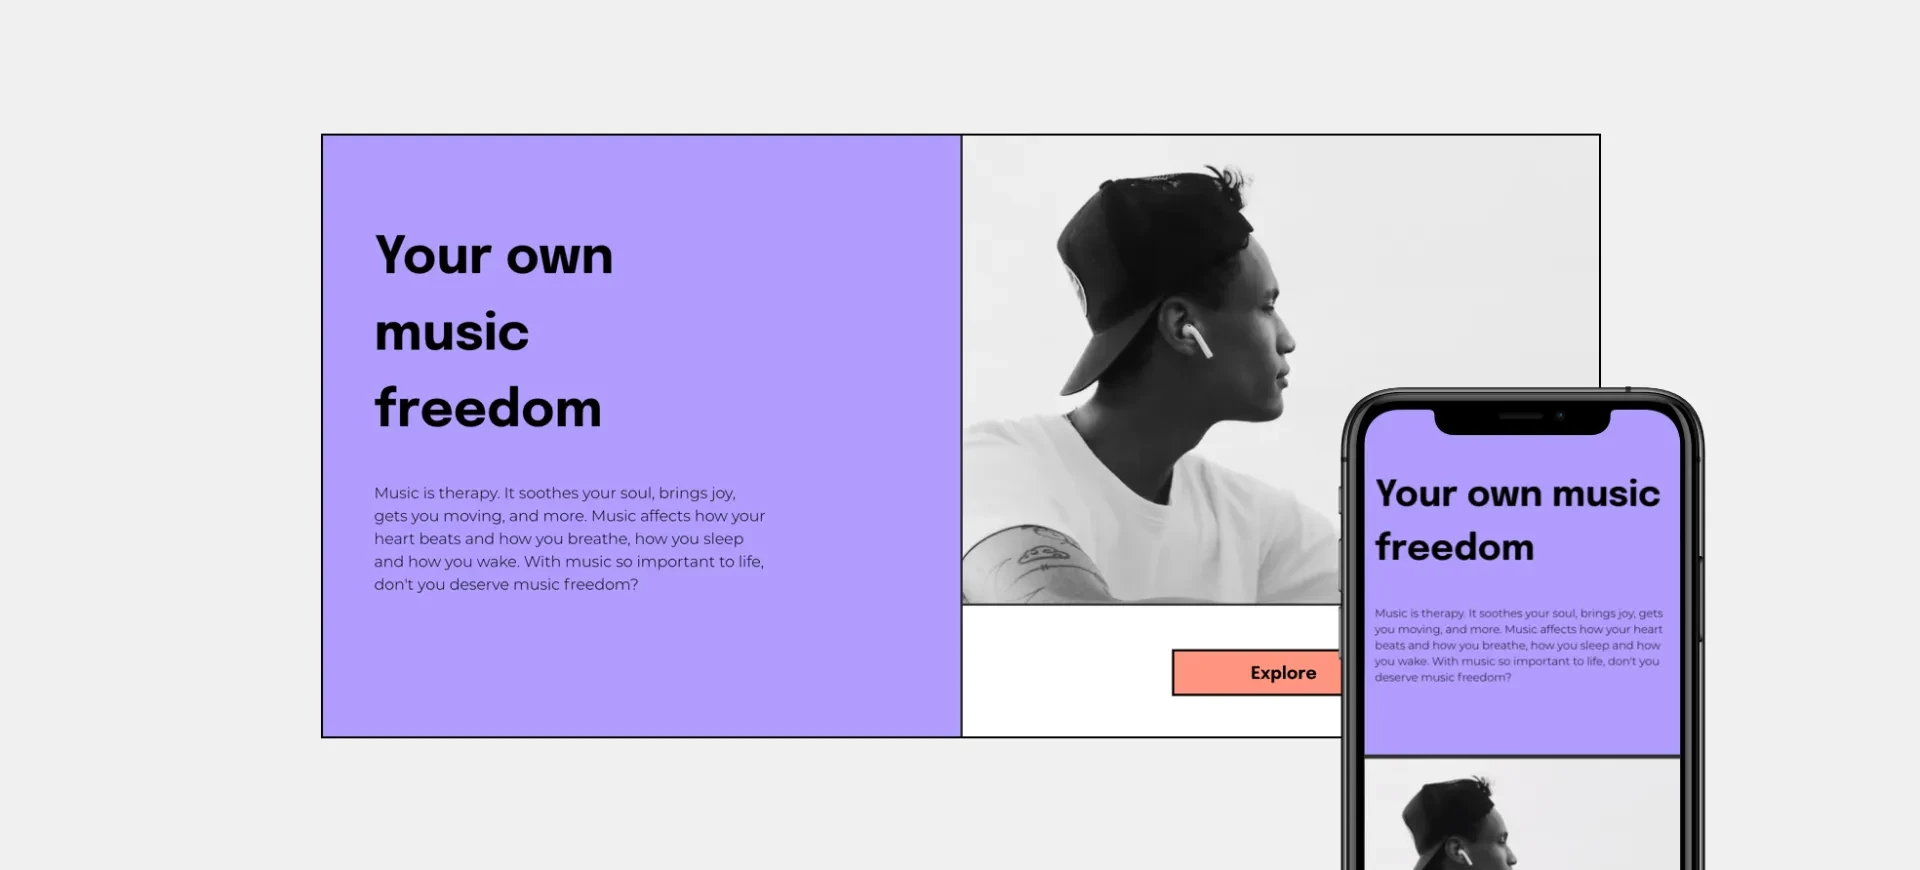
Text & Video Sections

Shops & Services Section
How-to Guide for Recreating A Section

To recreate this Section on your own, follow these steps.
- Add a row. Set the row background color to white, set the right and left padding to 40px, and the top and bottom padding to 100px.
- Add another column to the row so you have 2 columns.
- In column 1, add 3 widgets: Title, text and button.
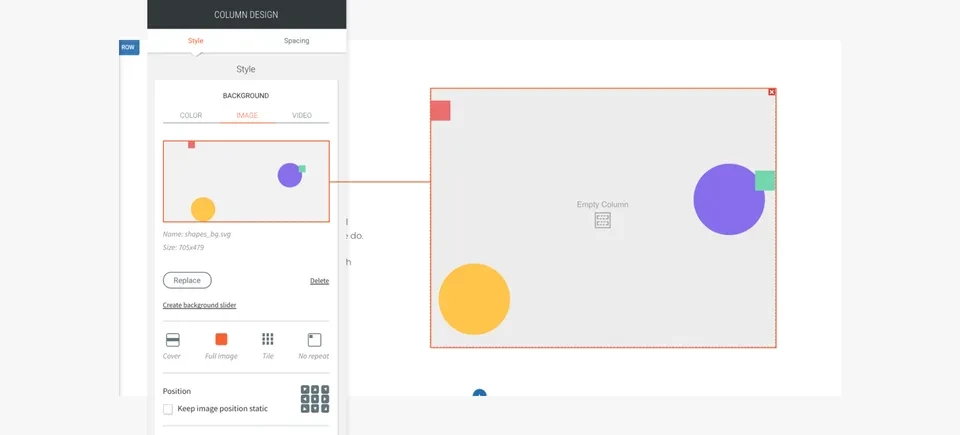
- In column 2, set all padding (top-bottom-left-right) to 50 px.
- Add a background image with shapes in png (so you keep a transparent background) and set the position to “Full image”.
- Add an inner row (with 2 columns):
- In column 1: Add a background image and set the position to cover.
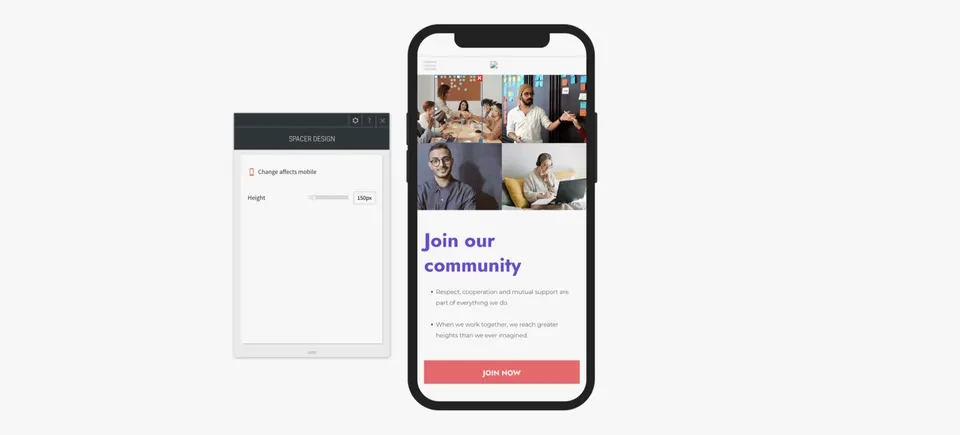
- Add a spacer widget and set it to the 200 px.
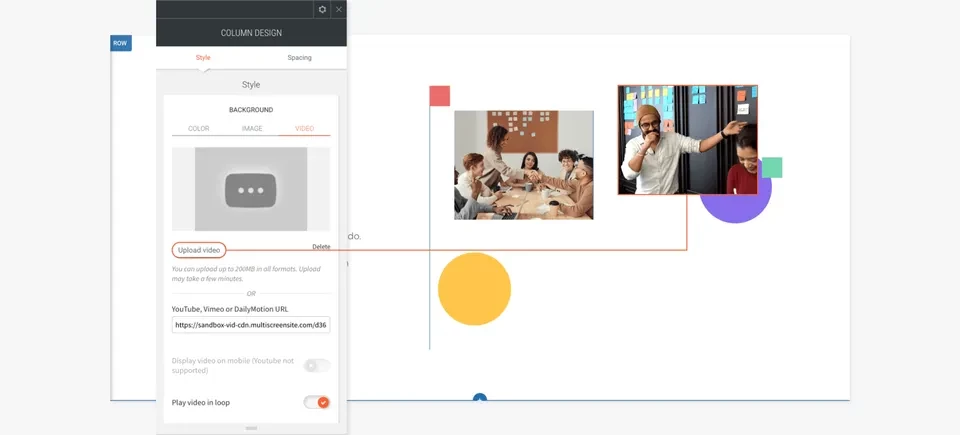
- In column 2: Add a background video, enable video in loop, set horizontal and vertical position to 50%.
- Add a spacer widget and set it to the 215 px.
- Hover the spacer until you see a small blue square in the bottom right corner. This square enables you to change the spacer’s dimensions. Drag the square inwards to make it more narrow than the column.
- Set the column spacing: set the left and bottom margin to 50 px and the top margin to -50 px.

1. Copy the inner row and paste it immediately below.
2. Replace the image with a video, and the video with an image, to create variety.
Adjust for Mobile
To set the mobile version of this section, open the mobile view and adjust as follows:
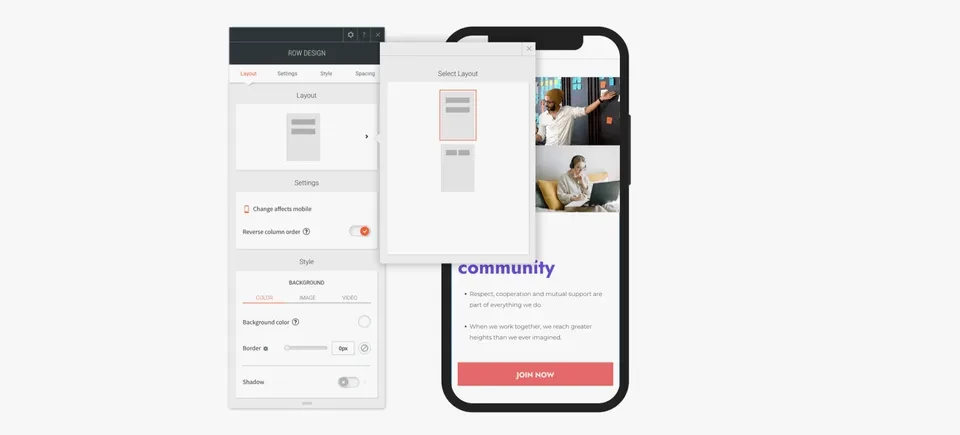
- Open the row editor: Choose the two row layout.
- Reverse the column order so the gallery displays above the text.
- Reset all spacing to 0px.

Open the inner row editor:
- Reset all spacing to 0px.
- Change the inner row layout to 2 columns.
- Set the spacers on all the columns (both background images and videos) to 150 px.
Remember: If you've built a section and love it, you can save it and use it over and over again using Team Sections. Your teammates can also use it. Just click Save as Section, give it a name, and it will be saved for future use.