

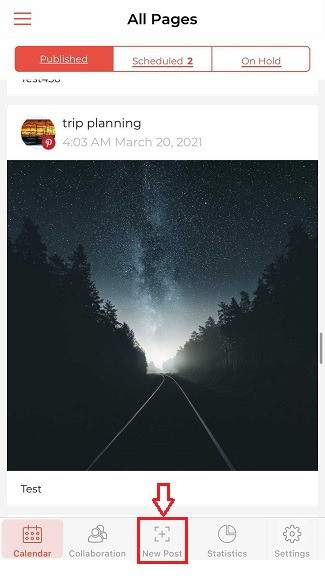
To create a new post from the camera roll in the mobile app follow the tips below.
1. Tap the plus icon at the bottom middle of your screen. It will open up the Post Editor form.
2. Select the social media channel you want to publish the post by clicking the + sign at the button of Post Editor.
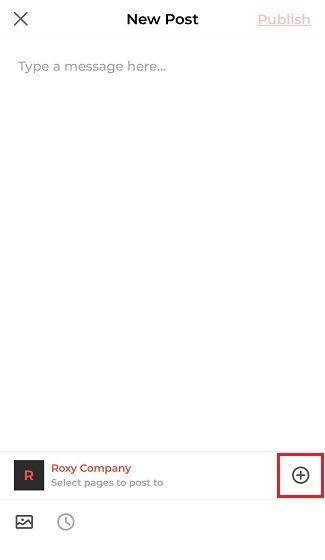
If you'd like to schedule it to multiple channels, tick the necessary pages and tap Confirm.
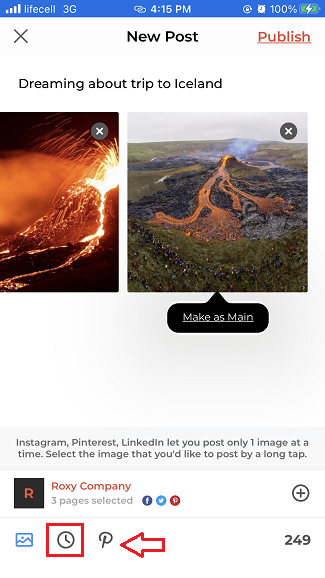
3. Type the caption and add a media attachment by tapping the image icon at the bottom left. Select a photo or a video.
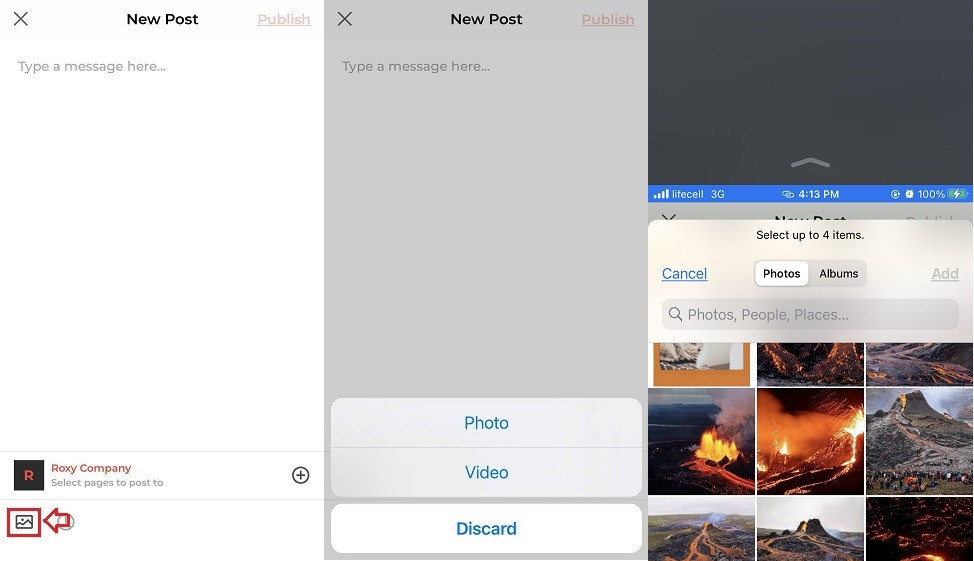
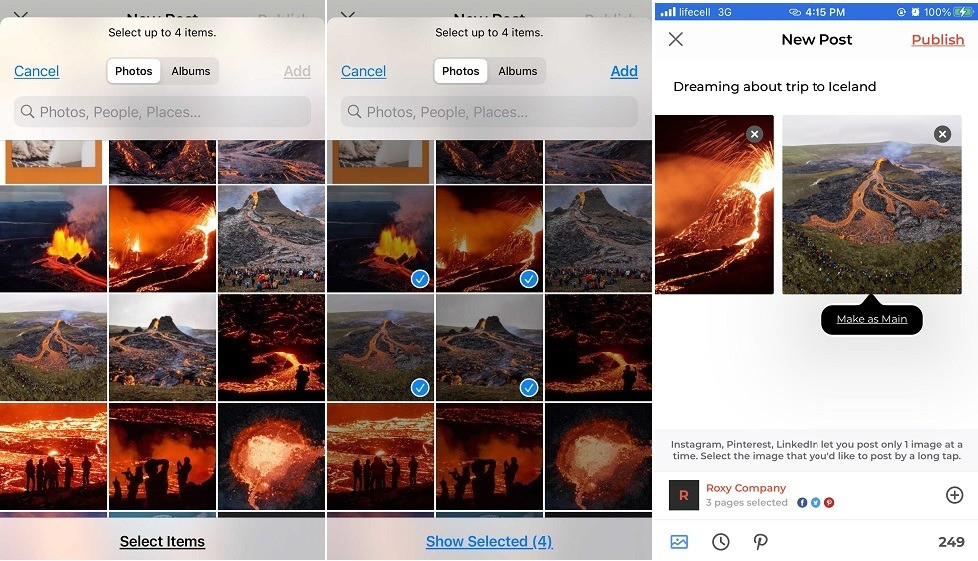
Note: You can only select up to 4 images or one video from the camera roll. Multiple photos option is available for Facebook and Twitter.
When you intend to post multiple images, for instance, to a Facebook page and a Pinterest board, you can choose one picture that will be published to Pinterest, and all selected images will be published to Facebook. Pick the image you’d like to post to the other social page (Pinterest in this example) with a long tap that will be prompted as Make as Main.
We support video posting to such social platforms as Facebook, Linkedin, Instagram Business, and Twitter. Although, video publishing is limited to Instagram Personal, Pinterest, and Google My Business. When attempting to post a video to these platforms, the preview will be published instead.
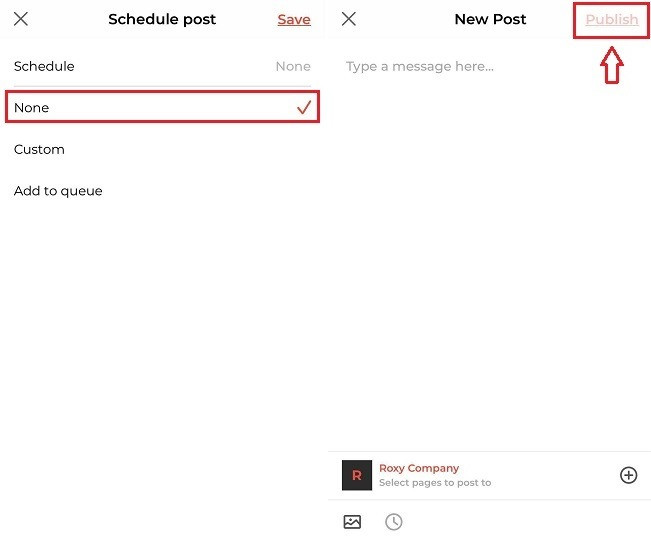
4. Once your piece of content is ready, tap the Clock sign at the bottom of your screen to schedule it in advance or the Publish button on the top to publish the post now.
Note that the Clock sign will be grayed out till you select the social page.
5. Choose a publishing method:
None
Custom
Add to Queue
None means publishing the post right away after tapping the Publish button on the top right. By default, the None option is selected.
Custom will enable you to choose a custom date and time to schedule the post. Once it is scheduled, you'll see the confirmation pop-up and the post itself in the Scheduled tab on the top.
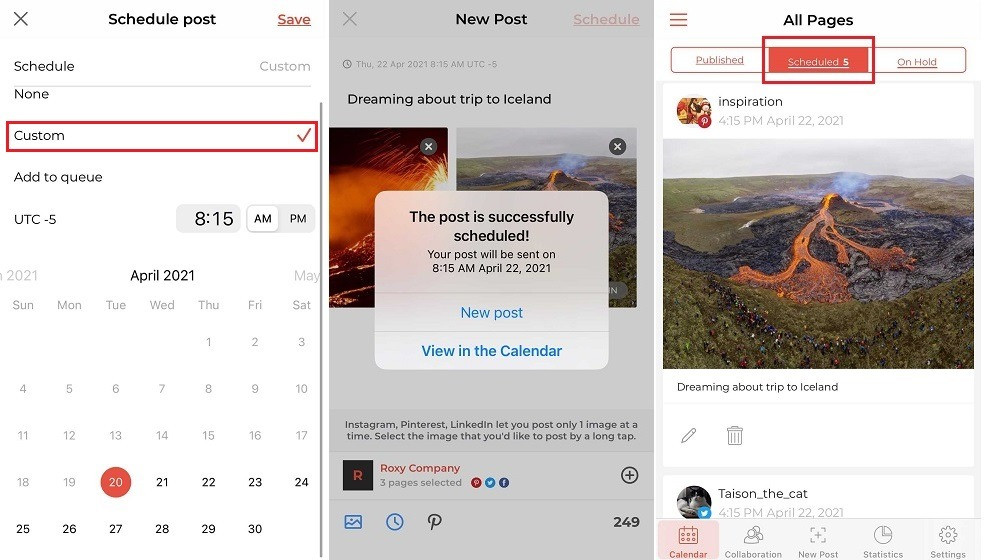
Add to Queue means adding the post to the pre-set schedule. You can read about the queue